Measuring a roof for metal roofing takes more than calculating square footage. You need the size of each roof plane, the correct panel coverage width, the length of each panel, and the measurements for ridges, eaves, valleys, hips, and other spots that need trim or flashing. Miss one of these, and you could order too little material, pay for extras you don’t need, or delay the install while you wait for a corrected order.
The good news is that a consistent measuring process makes the job much easier. Whether you’re estimating an exposed-fastener roof or a standing seam system, the goal is to turn accurate field measurements into a reliable material list. Here’s how to measure a roof for metal roofing, figure out panel quantities, account for roof features, and prepare an order your crew can use.
1. Prepare for the Roof Measurement
Before you measure anything, figure out the roof’s layout and the metal roofing system you plan to install. A simple gable roof is measured differently from a hip roof with valleys, dormers, and several intersecting planes. Knowing the layout helps you find every surface and edge you need to measure.
Start by reviewing the property, the existing roof, and any plans or aerial measurement reports you have. Decide whether the job is a tear-off, an overlay that the chosen system allows, or another install approach. Existing roof layers, decking, and structural issues can change the scope, but don’t assume the existing roof is ready for a new metal system until you check the manufacturer’s requirements and your local building codes.
Gather the tools your team needs, including a measuring tape or laser measure, a pitch gauge, a notepad or digital measurement sheet, and a way to label each roof plane. If you need to be on the roof, use proper fall protection and safe access. Don’t climb onto a wet, steep, damaged, or otherwise unsafe roof just to get a measurement.
For roofs you can’t reach or that aren’t safe to walk, consider an aerial measurement service like EagleView or RoofScope. Their reports can give you roof dimensions without walking every plane, though unusual shapes and critical dimensions may still need to be checked.
2. Identify the Metal Roofing System
Metal roofing panels aren’t all measured or installed the same way. Pick the panel profile before you calculate quantities, because the system sets the coverage width, panel lengths, fastening details, and which trim fits.
Two common options are exposed-fastener panels and standing seam panels. Exposed-fastener systems usually use screws driven through the panel surface, while standing seam systems hide their main fasteners under raised seams or in clips. Panel widths, attachment methods, and detailing can be very different.
Get the manufacturer’s specs for the exact product you’re installing. Confirm the effective coverage width, allowed panel lengths, minimum roof slope, required overhang, trim compatibility, and any limits on panel splices. These details should guide your measurements and material math, not assumptions from another metal roof you’ve installed.
3. Measure Every Roof Plane
Start by dividing the roof into individual planes. A basic gable roof has two main planes, while a hip roof or a more complex roof may have several. Label each plane so your measurements stay organized through estimating and ordering.
For each plane, record its width across the eaves and its length from the eave toward the ridge or upper end. If you’re measuring a roof that already has another covering, make sure you know whether your numbers follow the actual roof surface or just the building’s flat footprint. On a sloped roof, those two aren’t the same.
Measure the eaves, ridges, rakes, hips, and valleys separately. Also record the locations and sizes of chimneys, skylights, vents, dormers, and wall intersections. These measurements help you plan the panel layout, trim amounts, flashing, and the material needed around penetrations.
Your measurement sheet should list each plane, its dimensions, its pitch, and any unusual conditions. That way, your estimator doesn’t have to rebuild the roof layout from a handful of numbers after the inspection.
4. Calculate Roof Pitch and Actual Surface Length
Roof pitch changes the real surface area and the length of metal panels you need. A flat measurement from the eave to the ridge is shorter than the distance along the sloped roof, so using the footprint without accounting for pitch leads to wrong quantities.
Pitch is usually written as rise over a 12-inch horizontal run. A 6/12 roof, for example, rises 6 inches for every 12 inches of horizontal distance. Record the pitch of each plane instead of assuming the whole roof has one slope.
If you have the horizontal run and the pitch, you can calculate the slope factor:
Slope factor = √(12² + rise²) ÷ 12
For a 6/12 pitch, the slope factor is about 1.118. Multiply the flat area of that roof plane by this factor to estimate its sloped surface area.
For example, a roof plane with a 600 square foot footprint and a 6/12 pitch has about 671 square feet of sloped area, before waste or special details. For panel length, use the real eave-to-ridge distance along the roof, or calculate the sloped distance from the verified horizontal run and pitch.
When you order panels, include the manufacturer’s required eave overhang, ridge or upper end details, and any other listed allowances. Don’t use one overhang number for every metal roofing system.
5. Calculate the Number and Length of Metal Panels
Once you know the size of each roof plane, you can figure out how many panels you need. The key is to use the panel’s effective coverage width, not its overall width. A panel may measure 36 inches across but cover less than that once the side lap or seam is accounted for.
Use this formula: Panels required = Roof plane width ÷ Effective panel coverage width
Always round up to a whole panel for each plane. For example, if a roof plane is 30 feet wide and the panel gives you 2.83 feet of effective coverage, the math comes to about 10.6 panels. You’d need 11 panels to cover that width, subject to the manufacturer’s layout and edge-detail rules.
Calculate each roof plane on its own. Two planes that look alike may have different widths, and combining them can hide shortages or give you the wrong panel count.
Next, work out the panel length for each spot. Measure along the roof surface from the eave to the upper end, then add the allowances the system calls for. If a plane needs several panel lengths or end laps, follow the manufacturer’s install and ordering guidance instead of assuming one long panel will work.
6. Measure Ridges, Eaves, Valleys, Hips, and Rakes
Panel quantities are only one part of a metal roofing takeoff. The roof’s edges and intersections need the right trim and flashing, and those materials should be measured separately.
Record the total length of each feature:
- Ridge: Measure the length of each ridge that needs ridge cap.
- Eaves: Measure the lower edges that need eave trim or drip edge.
- Rakes: Measure the sloped gable edges that need rake trim.
- Hips: Measure each hip that needs matching hip cap or flashing.
- Valleys: Measure each valley where roof planes meet.
- Wall intersections: Record the lengths of sidewall and headwall connections that need flashing.
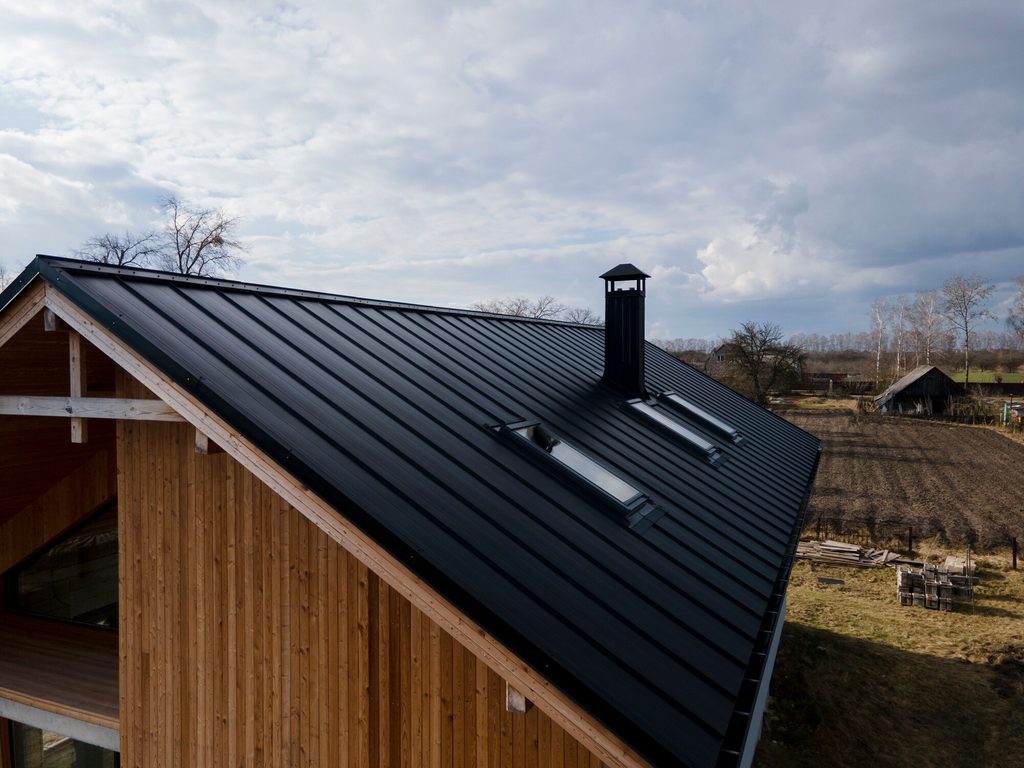
Use these measurements to work out the trim lengths you need, accounting for stock lengths, overlaps, and the joining details the manufacturer specifies. Don’t assume every trim profile works with every panel system. Confirm the parts with your supplier before you place the order.
7. Account for Roof Features and Penetrations
Chimneys, skylights, plumbing vents, exhaust vents, and other penetrations make panel layout and flashing harder. Their locations matter as much as their sizes, because a penetration may land on a seam, a panel edge, a valley, or another key detail.
Record the size and position of each feature on the roof plane it sits on. Note any special flashing needs and any conditions that could change panel widths or lengths. For complicated roofs, a sketch with labeled dimensions helps the estimator and installer see where everything sits.
Don’t automatically subtract every penetration from the total metal order. Small openings may barely change panel quantities because panels still have to span the roof around them, and cutouts create waste. Instead, figure out the panels needed to cover each plane, then account for the openings and leftover offcuts when you plan the takeoff.
8. Calculate Underlayment, Trim, and Other Materials
After you calculate the panels, use your measurements to build the rest of the material order. Underlayment amounts should be based on the real roof surface area, the product’s coverage, required overlaps, and install details. Ice and water protection should follow your local code and the system’s specs, including any needs at eaves, valleys, or other weak spots.
Fasteners and clips need special attention. Their amounts and spacing depend on the panel profile, install method, supporting structure, wind requirements, and the manufacturer’s instructions. Don’t use a generic screw count or clip spacing when the system has its own fastening schedule.
Include sealants, closures, pipe boots, and flashing where they’re required. Review every roof plane and penetration before you finalize the order. Add a reasonable allowance for cutting and waste based on how complex the roof is and the manufacturer’s guidance, instead of using the same made-up percentage on every job.
Accurate Measurements Make Better Metal Roofing Jobs
Measuring for metal roofing is a repeatable process when you break it into clear steps: identify the system, measure each plane, account for pitch, calculate panel coverage, document roof edges and penetrations, and double-check the full material list. The details matter because a correct square footage alone doesn’t guarantee the right panel count or trim order.
For roofing contractors, accurate measurements also support better estimating and clearer communication with customers. ProLine helps keep customer info, quotes, tasks, and follow-up organized so your team can move from measurement to proposal without losing track of the job. Visit useproline.com to see how ProLine can help your roofing business send quotes faster, keep projects organized, and sell more jobs.
FAQs
How do you measure a roof for metal roofing?
Divide the roof into individual planes, measure each plane’s dimensions and pitch, and record the lengths of ridges, eaves, rakes, hips, and valleys. Use those measurements to calculate surface area, panel quantities, and the trim and flashing the system needs.
Do you use panel width or coverage width to calculate panel quantities?
Use effective coverage width, which accounts for the panel’s side lap or seam. Using the overall width can lead to the wrong panel count.
Do you need to account for roof pitch when measuring metal panels?
Yes. Pitch changes the real sloped surface area and the distance from the eave to the ridge. Use actual surface measurements, or calculate the sloped distance from the verified horizontal run and pitch.
Can you measure a roof for metal roofing from the ground?
Aerial measurement reports can give you useful dimensions without roof access. But complicated shapes and critical install details may still need to be checked before you order panels.